https://learn.teachingchannel.com/video/teaching-slavery (Video on Building Background knowledge on Slavery in America for Elementary students)
Background knowledge can elicit what students already know, and build on existing knowledge to access new content.
5 ways to build background knowledge
Here are a variety of ways to activate students’ prior knowledge and build further background knowledge to prepare for new learning.
Graffiti Wall
Graffiti Wall is a simple, fun, and interactive activity helped to get kids involve in learning. All you need is a blank white board or some sheets of butcher paper to get started. Students can write, draw, and express themselves as they learn a variety of subjects. They can include relevant words in their home language. Read and discuss the entries together as a class.
Here is an example:
Introduce new concepts with open-ended questions.
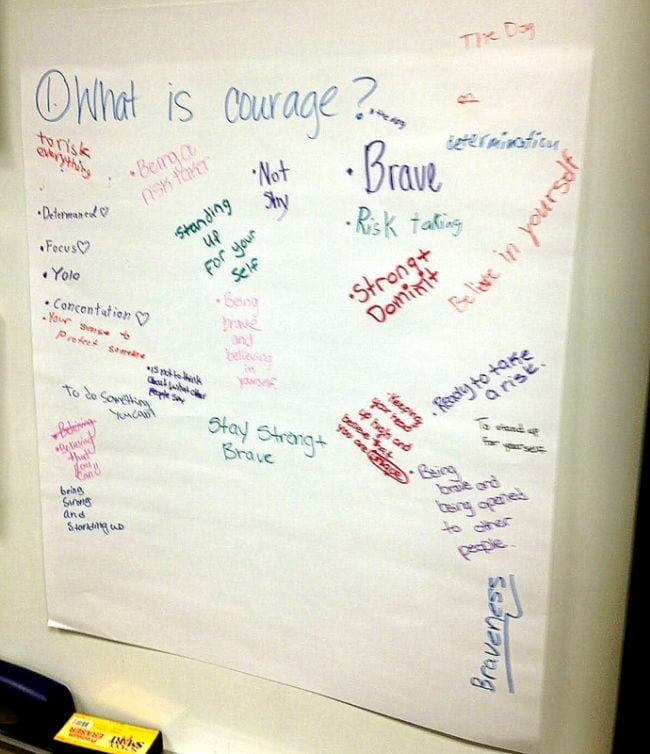
Before starting a new unit or book, get kids to reflect on what they already know about a topic or idea. Ask them “What are clouds?” or “What do you know about the history of our state?” Save the graffiti walls and compare their answers after they’ve completed the unit to see what they’ve learned.
Gallery Walk
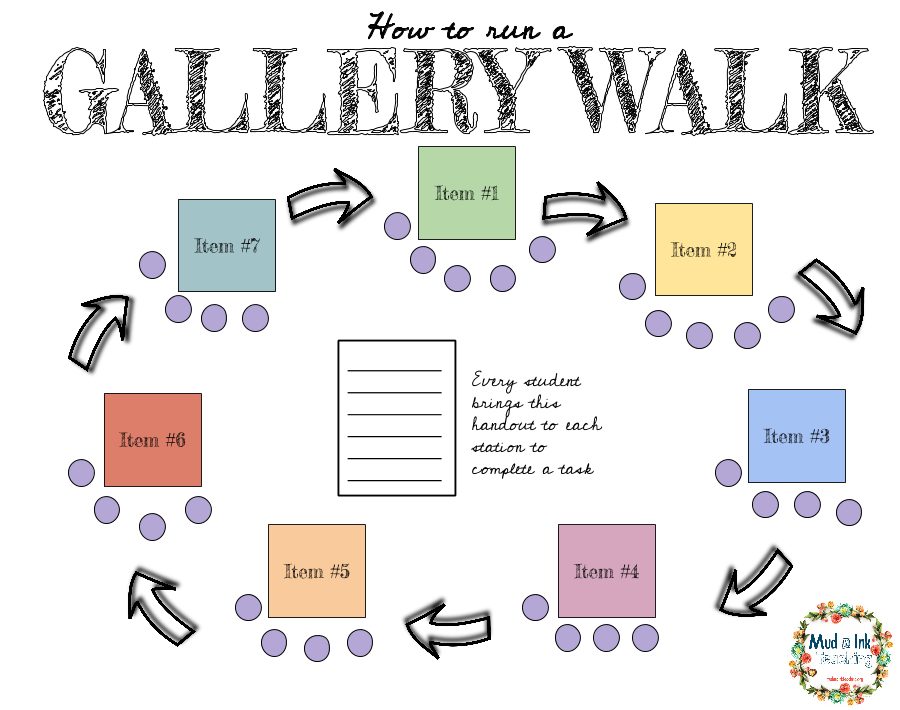
A gallery walk is a student engagement activity where groups of students interact with different stations set up around the classroom. At each station there is a question written on a large sheet of butcher paper or poster board that students have to think critically about to answer. Students usually write their response on a sticky note or directly on the large sheet of paper and then continue to the next station.
And depending on class size, a gallery walk can have five to ten stations. Group sizes are typically small, ideally between four to six students. For example, they might split a class of 30 students into six groups, with each group containing five students. Small groups maximize engagement and ensure we do not lose students in a crowd.
Four Corners
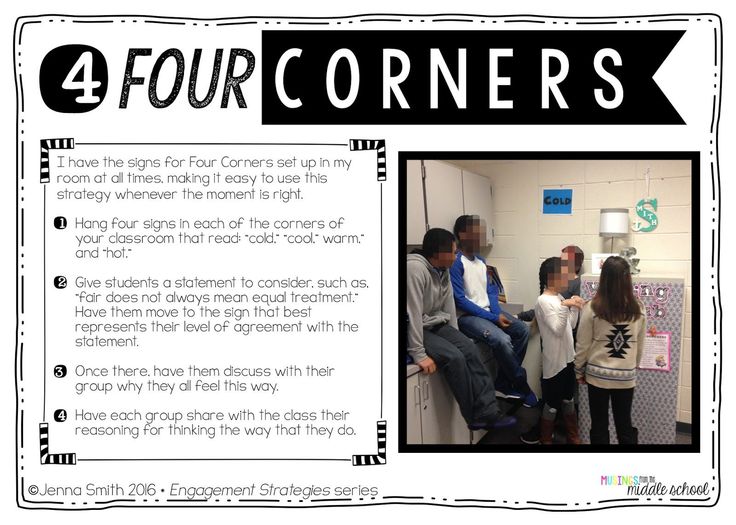
Four Corners stimulate student learning through movement and discussion, and it can also be a formative assessment. Teacher asks students a controversial statement or a question. In each of the four corners of the classroom, an opinion or response posted. Students express their opinion or response by standing in front of one of four statements and then talking to others about why they have chosen their corner. Four Corners promotes listening, verbal communication, critical thinking, and decision-making.
Inquiry Charts
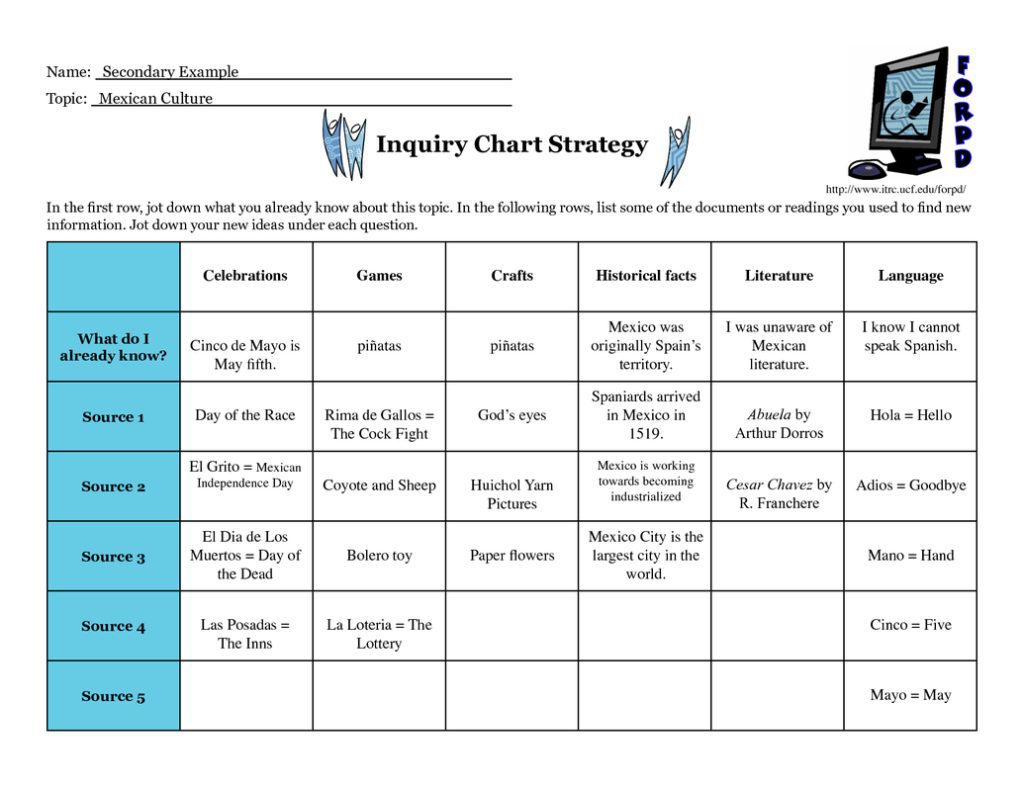
The Inquiry Chart (I-chart) is a strategy that enables students to gather information about a topic from several sources. Teachers design I-chart around several questions about a topic. Students read or listen to several sources on the topic and record answers to the posed questions within I-chart. Students generate a summary in the last row. They can explore different answers from various perspectives as a class.
Why use an inquiry chart?
- It fosters critical thinking and strengthens reading skills.
- It teaches younger students to generate meaningful questions about a topic and learn to organize their writing.
- Students build upon prior knowledge or thoughts about the topic by sharing interesting facts.
- It can serve as an evaluation tool for how much a student has learned about a topic.
Applying Building Background Knowledge to Unit Lesson
Seeds, Plants, and Plant Growth Unit
Rosa started her unit with an essential question:
How does what we grow help us grow?
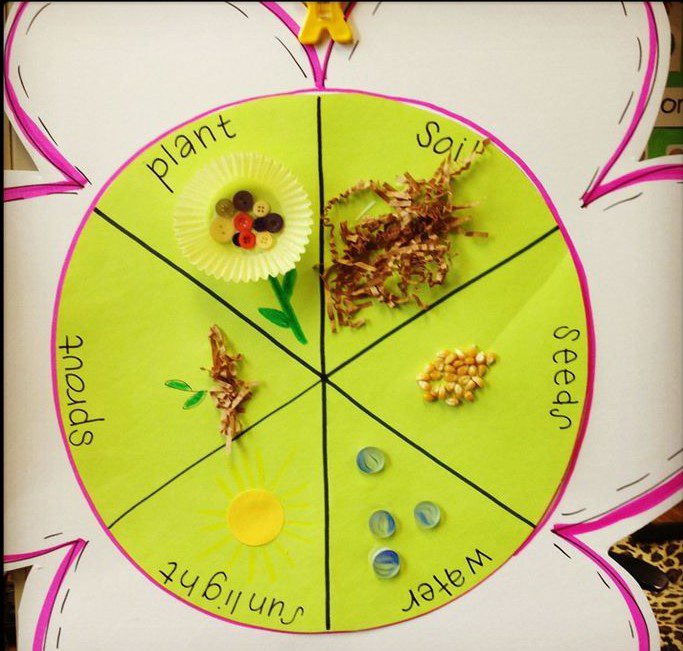
She then proceeded to bring in a jar of seeds and asked her 3rd grade students “What do you see?”. Rosa use a circle graph to write the word “Seed” in the middle circle.
After the circle graph is completed, Rosa asks her students to write a sentence. She puts a sentence frame on the board: “Three kinds of seeds are ______, ________, and _______.” She points out that writers use commas to separate words in a list. Then she gives students time to write their sentences.
Rosa puts her students into groups to help them further investigate seeds and types of seeds. She organizes some groups with all native Spanish speakers and other groups with two or three members who speak other home languages. She encourages the children to speak their home languages if that helps them.
She gives each group a plastic baggie with a variety of seeds they have already seen in their first circle graph activity. She asks the children to glue all the same types of seed inside circles drawn on a sheet of paper and then label each circle with the name of the type of seed.
Next, Rosa gives each group a seeds classification chart. Together, they chart a few types of seeds by listing color, shape, feel, and smell, if any. Before starting, they talk about some descriptive words for texture, like bumpy, prickly, smooth, hard, and soft. They also talk about the odor or the smell. Students predict the seeds won’t have much odor. The students then work together to fill in the rest of chart. Rosa has her groups share the answers on their charts and leads a class discussion on the characteristics of the different seeds.
Then Rosa asks the students to use the chart to write a sentence that shows the difference between two types of seeds. She writes a sentence frame on the board: “______ seeds are ______ and ______, but ______ seeds are ______ and ______.” She shows the class how to complete the sentence using a pumpkin seed and a lettuce seed as her example. She explains that they can use words like but to show how two things are different. She points out that words like but that connect two sentences are preceded by a comma.
Gallery Picture Walk
After building background for her students with the seed activities, Rosa collects pictures of different types of plants that grow from the seeds that the students identified earlier. She finds pictures in the library, in magazines, and on the Internet.
She posts the pictures around the classroom with a sheet of paper under each picture for students to write on. On a table, she puts the seeds into five piles and numbers each pile. Working together, pairs of students match the picture of each plant with the number of one of the piles of seeds; they write a sentence under the picture that identifies each plant and explains why they made their choice of the seed.
Rosa asks them to use sentences with the word because. She gives them the example, “I chose seed number 3 for the sunflower picture because it is oval and has a white stripe.” After students have moved around the room writing what plants they see and the number of the seed for each plant, Rosa asks students to walk around the room again and read the answers their peers have written. This leads to a lively discussion about the plants and their seeds.
As you can see, Rosa used graphic organizers and realia (bags of different type of seeds) to elicit from students what they already know and building initial knowledge they need in order to access Seeds and Plants content.
Rosa, then, proceeded to engage the unit with activities such as KWL chart, Rating Scale, and picture walk with a book.
